Monday, December 7, 2009

Santa's Sleigh

I found a great idea about making Santa's sleigh from a Sandra Lee show.  It's so easy!
-graham crackers
-red and white icing
-candy canes
-coconut
-little santa candy


1.  Frost one graham cracker with white icing, and another with red.
2.  On the white cracker, place two candy canes on the top at the sides. 
3.  Put a little extra icing on top of the candy canes and put the red cracker on top.
4.  Decorate with coconut to look like snow and put Santa on his sleigh!
*Sandra also did a seat made out of licorice to put Santa on, and did a sack made out of a fruit roll-up, with starburst presents inside and on the sleigh for decoration.


Tuesday, November 17, 2009

Barrette Organizer


This was made for Kate by her former childcare provider.  It's pretty cute and really easy, and so useful!  You can buy the wooden shapes at any craft store and and paint it.  Then just attach a ribbon from the bottom and you can clip all of your barrettes onto it.  Makes life a lot easier for us with Kate!


I also like doing these coat hangers.

Monday, November 16, 2009

Angel Food Cake with Berries and Cream


Take an angel food cake and cut of the top with a serrated knife. 
Then dig a tunnel in the bottom of the cake (hollow it out).
Then fill the space with whipped cream (I actually prefer cool whip), some fresh berries (your choice, but I definitely recommend strawberries and some fresh mint), the pieces of the cake that you took out and a little bit of flavored extract (your choice).
Then put the top back on and frost with the rest of the whipped cream/cool whip.
Decorate with the rest of the berries and refrigerate until serving.

Friday, November 13, 2009

Picture Frame


I did it!  I bought this "Wish" decoration at Ross, then I took some string and tied it to a picture frame to hang in my kitchen.  It's really cute!  I plan to get better, more decorative, string and replace the white one I used. I also want to switch out the frame to a different one, but I just wanted to try it to see how it would look.  I think it's really cute. :)

White Chocolate Raspberry Cheesecake


I made this yesterday.  I love to make white chocolate cheesecake.  Usually I would put some raspberry sauce over the top too, (and I really like chocolate crust with it), but I used the ingredients that I had.

Tuesday, November 10, 2009

Make Your Own Tutu!


You can easily make your own tutu for your little girl!  I didn't make this one, but a friend did, and it was pretty easy. 

  1. Just go get a piece of elastic band (you'll have measure your daughter's waist for this part).


  2. Buy some tulle- in the colors that you want the tutu.  It could be all one color, or a bunch of different colors (like the one above).


  3. Cut the tulle fabric into strips.  They should be a little bit longer than you want the length of the skirt.


  4. Tie the fabric strips all around the waist band.  So simple!

OK, I haven't actually done one yet!  But it seems pretty simple!  I'll let you know...
Maybe Dawn can show me how to do some fancy bows one day.... :)

Customized Picture Frames


I saw this picture frame at Walgreens yesterday and thought it was really cute.  I think it would be really easy to make some, with anything you want on top (a word, a cut-out shape, another frame, etc.). 
  1. Just take whatever word you want (you can find words like "love", "peace", "family", etc. at any craft store or even Target, Ross, Wal-Mart, etc.). 
  2. Then find small frames you want to use to hang (as many as you want, or as many as will fit).
  3. Then glue (make sure it's a good wood/craft glue) one end of a piece of ribbon to the little frame you want to hang, and glue the other end to the thing you are hanging it from.  You could make cute little bows in the ribbon.
  4. Then attach some picture hangers to the back of it and hang.
I might try to do this soon.  I love the idea- I think it's really cute!

Friday, November 6, 2009

Easy Flatbread

I love making this flatbread to go along with any dish.  I just take a can of pizza dough and roll it out onto a cookie sheet.  Then I top it with olive oil, garlic, whatever herb I feel like (rosemary, Italian seasoning, etc.) and parmesan cheese.  You could even work ingredients directly into the dough if you want, like red onion and herbs.  Then I bake it according to the directions.  It's great!

Thursday, November 5, 2009

Spaghetti Sauce

I love to make "semi-homeade" pasta sauces.  I take a jar of basic red tomato sauce (Hunts Four Cheese) and add my own stuff to it.  You can add chicken broth or wine for depth of flavor.  You can add crushed red pepper for heat.  I like to add veggies too- garlic, onions and red peppers are good.  If you add fresh herbs, it tastes really fresh- basil and parsley are great!  You can even puree vegetables- carrots, red peppers, carrots, squash, or anything- and add that in for extra flavor (and to sneak in some extra veggies for the kids!).

Wednesday, November 4, 2009

Orange Sauce


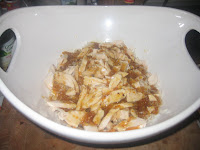
This is a sauce I heard about on The Barefoot Contessa yesterday. She did it for ham, as a glaze, but I thought I could tweak it a little bit and use it to make orange chicken with rice. BJ loved it, but I thought it was a little too sweet, so when I make it again, I will use less marmalade. You could really use it for anything- stir fry, vegetables, green bean sauce, noodles, etc.

Ingredients:

  • 1 jar (or less) of orange marmalade


  • 1/2 cup brown sugar


  • 6 cloves garlic


  • 1/4 cup orange juice


  • a squeeze of lemon juice, along with a little lemon zest


  • crushed red pepper, depending on how hot you like it


  • dash of salt and pepper
    Directions:


  • Mix all the ingredients in a food processor.


  • Pour sauce into saucepan/pot and bring to a boil, then simmer.


  • Enjoy!

(You could also just pour the sauce directly over the meat once mixed and use as a glaze or marinade.)

No-Bake Peanut Butter Chocolate Cups


This recipe is from a Nestle Tollhouse dessert cookbook I have (it has such yummy stuff in it!). I love it cuz it's "no-bake" and pretty simple. I used a mini-cheesecake springfoam pan to do these last night, but you can do them in a square/rectangle pan and just cut bars.


Ingredients:


  • 2 cups peanut butter, divided


  • 3/4 cup (1 and 1/2 sticks) butter, softened


  • 2 cups powdered sugar, divided


  • 3 cups graham cracker crumbs


  • 2 cups (1 package) Nestle Tollhouse semi-sweet choc. chips


  • Directions:


  • GREASE 13 x 9-inch baking pan.


  • BEAT 1 1/4 cups peanut butter and butter in large mixer bowl until creamy.


  • Gradually beat in 1 cup powdered sugar.


  • With hands or wooden spoon, work in remaining 1 cup powdered sugar, graham cracker crumbs and 1/2 cup morsels.


  • Press evenly into prepared baking pan.


  • Smooth top with spatula.


  • MELT remaining 3/4 cup peanut butter and remaining 1 1/2 cups morsels in medium, heavy-duty saucepan over lowest possible heat, stirring constantly, until smooth.


  • Spread over graham cracker crust in pan.


  • Refrigerate for at least 1 hour or until chocolate is firm.


  • Cut into bars.


  • Store in covered container in refrigerator.

Tuesday, November 3, 2009

Smoothie Pops

I love to make smoothies and smoothie pops for my kids because it's such a great way to get them to eat fruit and yogurt. They are full of all kinds of great stuff and the kids love them! I can give them a smoothie pop instead of a popsicle and not feel guilty! There are so many different ways to make them- just throw whatever you like in the blender and there you are! This is how I like to do it:

-1 can of peach yogurt
1 can of strawberry yogurt
(sometimes I will sub. blueberry for one of the other flavors)
-1 banana (this is important to make it creamy and smooth)
-a big andful of frozen fruit- I use strawberries, blueberries and peaches (fresh fruit is great too!)
-orange juice
-apple juice

Just put all the fruit and yogurt in the blender, then fill to the top with juice. Blend away. I pour each of the kids a cup to drink right away, then I freeze the rest in popsicle containers for smoothie pops that the kids love! They make a great snack or dessert, and they taste so much better than regular popsicles. :)

Monday, November 2, 2009

*Halloween Cake*

This is the cake I made for Halloween. Kate helped me decorate it with the sugar candies. What would be more appropriate for Halloween than a delicious Devil's Food Cake?!?! I added orange extract to the mix to give it a little special flavor. Then I used orange food coloring to make the frosting, and used the Betty Crocker Cupcake Icing to trim it.

*Tips and Tricks*


*If you don't have a pastry bag, you can do a quick and easy make-shift one by using a ziplock bag and snipping a hole in the top. You can use scrapbooking scissors with the designed blades to snip a design too. Just fold the edges of the opening down (to avoid a mess!), fill the bag with the frosting, and then snip the top and ice away!


*Also, I just found a new product (well, new to me) at the grocery store last week and I LOVE it!!! It is Betty Crocker's Cupcake Icing and it is so great! Makes decorating cakes, cookies and all sorts of treats so easy and fun!


*Lemon Coconut Cake*

I made this cake last night. It is so yummy! You can do it as homeade, or semi-homeade, as you like! I didn't have coconut (which I realized after I had started!), so I just decorated the top with sprinkles.

What you need:
-1 box lemon cake mix (or you can use yellow or white, and add lemon curd, lemon extract and other stuff to make it lemony) (or you could do it all from scratch!)
-3 eggs
-1/3 cup veg. oil
-1 and 1/4 cup water
-about 1 tsp. coconut extract
-the zest of 1 lemon
-lemon curd (optional)
-lemon extract (optional)
-frosting of your choice (I used plain white)
-coconut shreds for decoration

1. Preheat oven to 350
2. Mix cake mix, eggs, oil, water, coconut extract, and lemon zest (you could add lemon curd/lemon zest if you like, for extra flavor)
3. Pour into cake pan (I used a bundt cake pan) and bake according to directions
4. Let cool completely

5. You can make any kind of frosting/icing you want. To make it extra special, you can add either lemon or coconut extract to it for flavor. Frost cake.
6. Decorate with coconut shreds (or any other topping)
Enjoy!

Friday, October 30, 2009

*Tips and Tricks*


*You can create homeade flavor to any boxed cake, frosting, etc. by adding a tiny bit of flavored extract. Use any flavor you like and it will give the food an extra burst of flavor, as well as make it taste homeade! Almond extract is one of my favorites!


*Save any containers from your groceries or take out (berries, salads, lunch meat containers, etc.). You can reuse them to make cute little care packages or give your guests leftovers. You can even decorate them if you want to be really crafty!

*Get a very "Pottery Barn"-ish look in your child's room by framing some of his/her artwork. Glue it on a colorful background, put it in a cute frame, and decorate his/her room with the work. The kids love to see their work displayed, and is an inexpensive way to add cute style to your little one's room! It makes great gifts for family too!

*Pumpkin Cupcakes*


These little pumpkin cupcakes are so cute and festive for Halloween!
To make, you can use mini-bundt pan molds, or any small mold you have (I did these with a flower bundt mold that I have). You could also just use regular cupcake pans if you want.

-1 package of white cake mix
-3 eggs
-1 and 1/4 cup water
-1/3 cup veg. oil
-orange food coloring (or red and yellow to mix)
green food coloring (or blue and yellow to mix)
-white frosting
-green licorice (they have mini green sour sticks), or any green or brown candy you can use as the stem

  1. Preheat oven to 350


  2. Mix cake according to directions on box


  3. use food coloring to dye the cake mix orange


  4. pour into pan/mold


  5. Bake according to directions


  6. let cool


  7. mix food coloring in frosting to make green


  8. frost the cupcakes with the green frosting to make it look like leaves on top


  9. put the "stem" in the middle

Enjoy!

Thursday, October 29, 2009

*Crack*

This is a recipe that everyone always asks for anytime I make it. It is so good... hence the name "crack"!!! And it is so easy to make...


  1. Preheat oven to 350


  2. Line a greased cookie sheet with foil.


  3. Line the sheet with Saltine crackers (it takes about 1 to 1 and 1/2 sleeves)


  4. Mix 2/3 cup brown sugar with 2 sticks of butter in a saucepan til mixed well.


  5. Pour sugar over the crackers.


  6. Bake for 5 minutes.


  7. Make sure the crackers are lined up and even (you might have to adjust them with a fork). Let cool.


  8. Melt chocolate chips (semi-sweet is best). You can do this by using a double boiler (chocolate in a bowl on top of a pot of boiling water- don't let the water touch the bowl, thoguh!) or you can nuke them in the microwave for a minute and a time, stirring til melted.


  9. Once crackers are completely cooled, spread chocolate over with spatula.


  10. Add any toppings you want (slivered almonds, white choc. chips/shavings, etc.)


  11. Cool overnight in fridge (or at least a few hours).


  12. Break apart with your hands and enjoy!

This really takes little time and is a sure hit with everyone!!! Make it special for any occasion by putting different toppings on (crushed candy canes during Christmas, orange sprinkles for Halloween, etc.)

*Cowboy Caviar*

This is such an easy, great recipe that you can whip up for company, or just to have in the fridge for snacking. I have been making so much of it lately! The best thing about recipes like this is that you can add or take out any ingredients you want to make it just the way you like. This is how I like it:

-about 5 medium-sized avocados, peeled and diced
-about 1/2 a red onion, peeled and diced
-1 red pepper, diced
-1 tblsp. chopped garlic
-1 can corn (I like the white corn), rinsed and drained
-1/2 can black beans, rinsed and drained
-a good helping of chopped cilantro
-the juice of one or two limes (you can even add in some lime zest)
-salt and pepper to taste

Mix it all together and you have the bet dip ever! :)
Like I said, you can make substitutions, add anything you like or leave anything you don't like out. It's so great that way! Personally, I like everything to be diced pretty small for this dip.

The Birth of a Blog...

I am so excited to start this blog!!! I am doing it because I started a family blog, "The Pasquels' Pics", and I wanted a place where I could share some things that I love to do- like cooking, baking and crafting. I thought it would be fun to be able to link this blog to my family blog, so that I could have a space, separate from the family blog. Also, I just figured out how to decorate and add to blogs, and I just wanted another chance to play around with it all! :)(By the way, this blog is blue with yellow, green and pink accents cuz that's the colors in my kitchen!) I plan to share all sorts of fun things- recipes, book lists, tips and tricks with the kids, etc. and I hope others will comment with their own ideas!